Dataflows: Powerful logic tools for controlling your forms
Dataflows are a powerful tool that allows you to control the behavior of your forms using logic. Dataflows can help you to create more dynamic and interactive forms, and to collect more accurate and complete data.
For example, you can use dataflows to:
- Disable or hide questions based on the input to another question. For example, you could use a dataflow to disable a question about a shipping address if the user selects "Pick up in store" as their delivery option.
- Disable or hide questions based on some common context, such as the day of the week. For example, you could use a dataflow to show a question only on Monday.
- Auto-fill questions based on user input or context. For example, if a user selects their country in one question, you can use a dataflow to automatically fill in their state in the next question.
Read the following example to learn how to use dataflows to achieve your goals.
Creating a dataflow rule
To create a dataflow rule, click the Dataflow tab in the form workspace and then click Add new rule. An empty rule will appear, as shown in Figure 1.
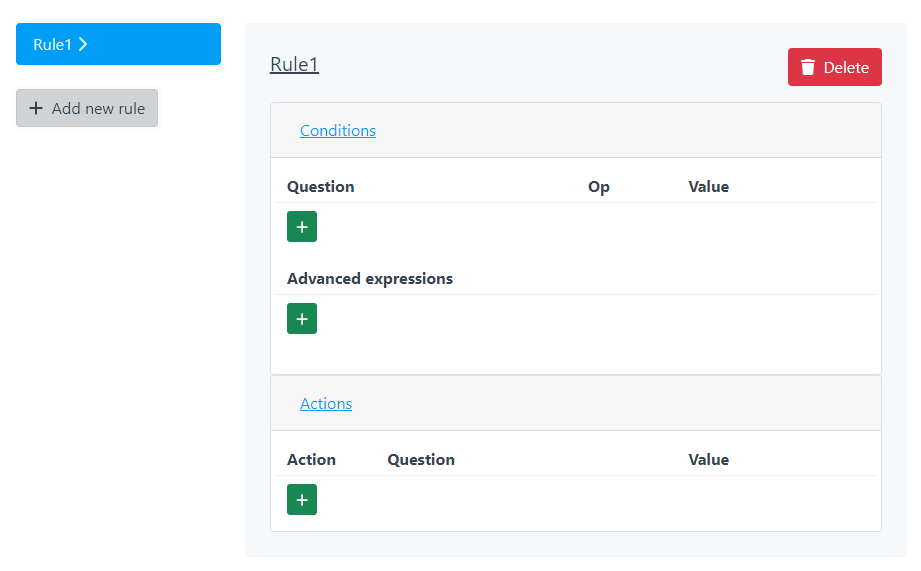
Figure 1: Adding a new rule in the dataflow
Editing conditions and actions in the rule
Each dataflow rule consists of two parts: conditions and actions. Conditions define when the rule should be applied, and actions define what should happen when the rule is applied.
There are two types of conditions:
- Question-related conditions:
- These conditions are based on the input of a question. To create a question-related condition, click the + button under the question in the empty table. A dialog box will appear, as shown in Figure 2. In the dialog box, you can define the operation on the input of the question. For example, you can compare if the question is checked or not.
- Advanced expressions:
- These conditions are independent of questions and are defined using JavaScript expressions. Use them very carefully. We will cover them in more detail later.
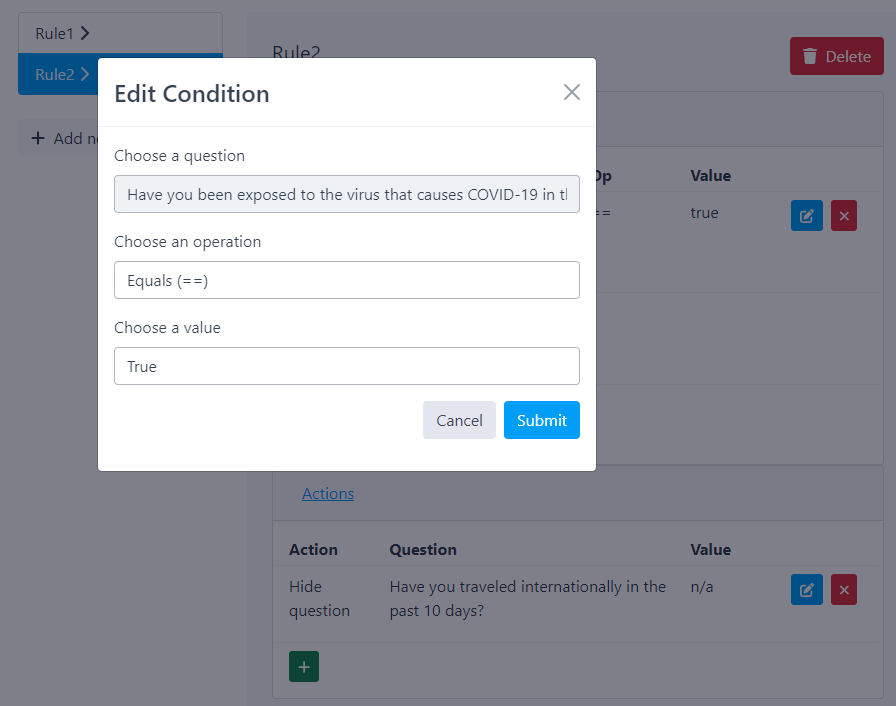
Figure 2: Editing the rule conditions
To edit the actions of a rule, click the + button in the Actions section of the rule. A dialog box will appear, as shown in Figure 3. You can choose one of the three following actions:
- Set question answer: This action allows you to set the answer of a question based on the conditions of the rule.
- Hide question: This action allows you to hide a question based on the conditions of the rule.
- Disable question: This action allows you to disable a question based on the conditions of the rule.
Choose the action that is right for your needs and fill out the remaining inputs.
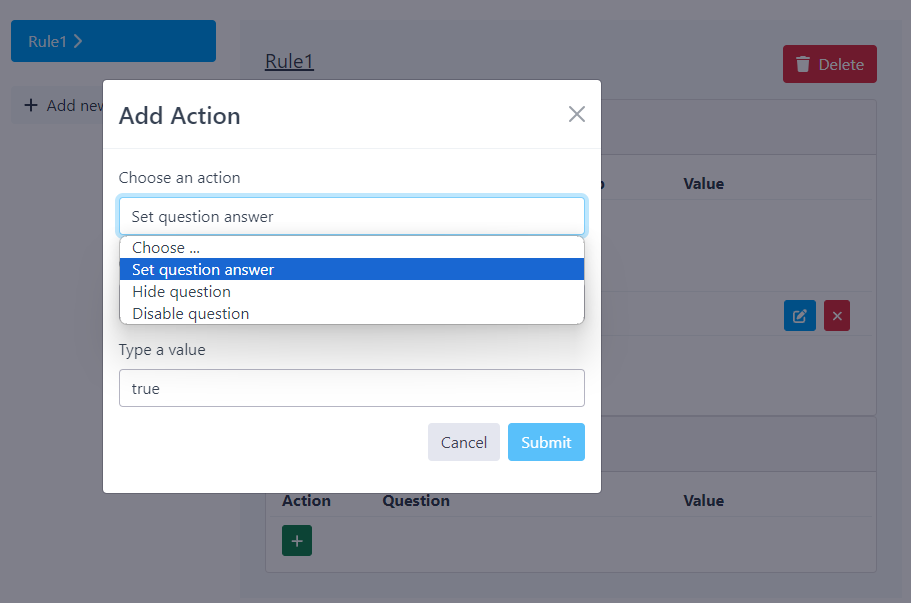
Figure 3: Editing the rule actions
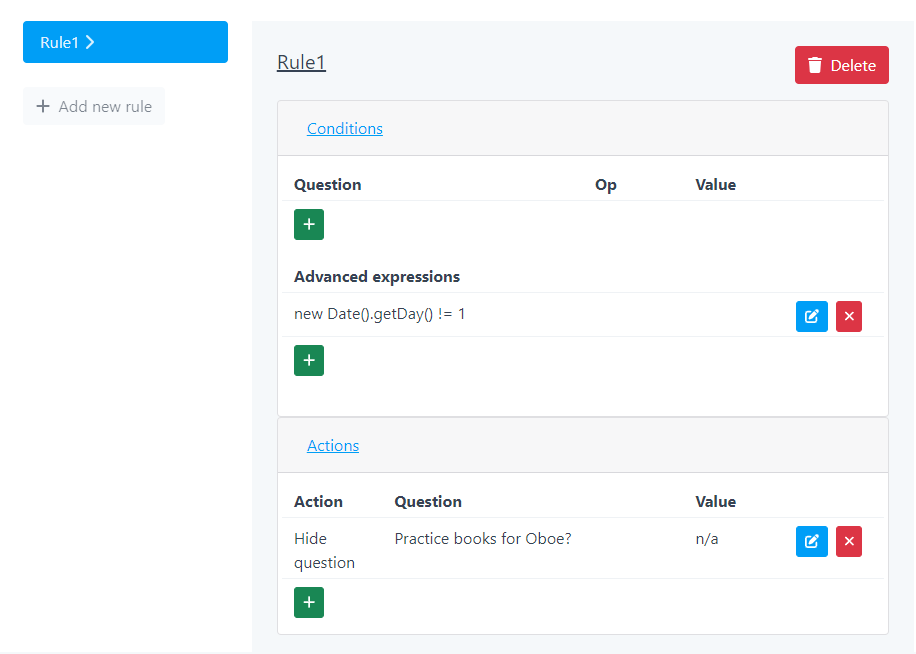
Once you've added conditions and actions to the rule, the updated rule definition will appear in the form workspace, as shown in Figure 4.
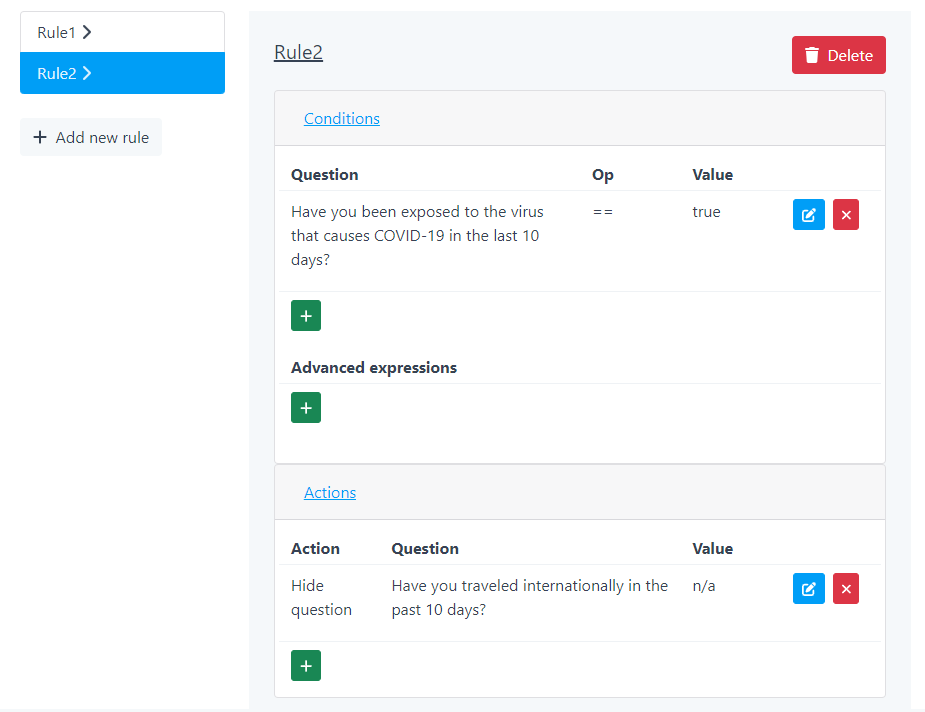
Figure 4: Rule definition in the dataflow
Advanced expressions
Advanced expressions can be used to express complex conditions. For example, the expression new Date().getDate() != 1, as shown in Figure 5, means "it is Monday".
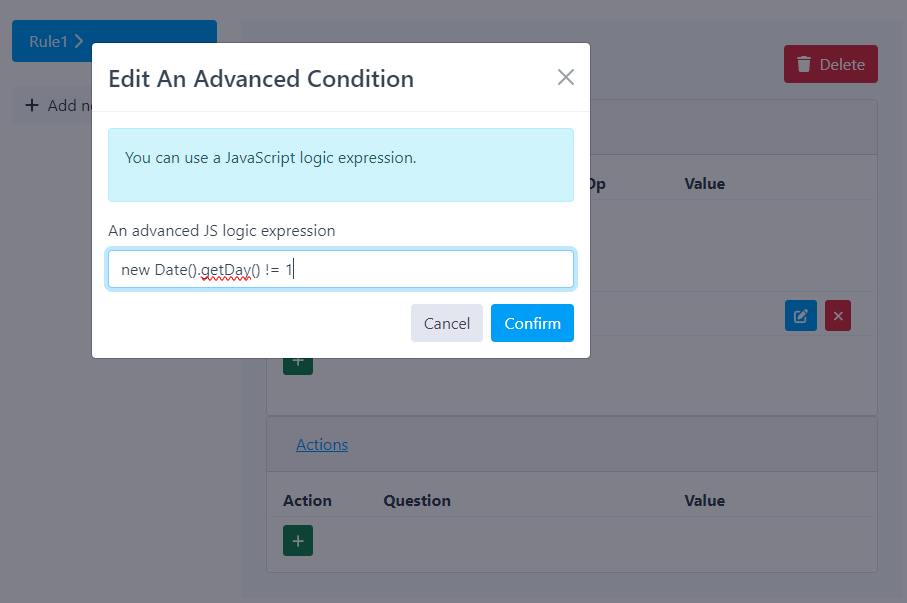
Figure 5: Editing the advanced conditions
Figure 6 shows the definition of the rule using advanced expressions in the conditions.
